Monday 23 July 2012

Jamaica me crazy!!

I was at Jamaica Me Crazy on Monday night, 23 July 2012. It is located at 74 Roodebloem Rd (btw Balfour & Chamberlain) in Woodstock, Cape Town. This was our second time at this rustic reggae eatery and I just had to share it with all of you, especially if you're looking for a new place to eat in Cape Town. The grub is fantastic - we haven't been disappointed thus far, with a few gluten free choices. They have a lot of REAL Jamaican food on the menu as well as plenty of fusion dishes. I recommend the jerk chicken and the crazy goat dish for the gluten-free (there are more choices on the menu, but these are the ones I've tried), and the Jamaican Rodeo gourmet burger  and Kingston schnitzel for those that can eat gluten. I know I shouldn't have, but I had a bite of hubby's burger and it was out-of-this world! On Mondays they have Monday Madness where you can get a great meal for R45, and cocktails are R17 during happy hour, from 6 - 7 pm, EVERY day. They also have local craft beers on tap and are very reasonably priced, including one of our favourites, Jack Black Pale Ale. We love the vibe, great reggae music, cosy fire, the service is pretty good for Cape Town, and they have a great deck upstairs where you can have sundowners with a view of the city in summertime. You're welcome to sit on the deck in winter time too, but I wouldn't advise it! :P All in all great for a relaxed time out!


Here's a link to their site - enjoy! http://www.jamaicamecrazy.co.za/

Wednesday 30 May 2012

Mayonayonnaise!


Making your own condiments is a good way of controlling which ingredients go into it and thus ensuring that it is gluten-free. Not to mention it is tastier than store bought brands. In this case it’s also quite a bit cheaper, actually. The ingredients are things that most people usually have in their homes. Which vegetable oil you use will depend on what you have in your house or what you would prefer. You could use olive, avocado, grapeseed, canola, or just plain sunflower or soya oil. The only preservatives in this recipe are natural ones – vinegar or lemon juice, and a small quantity of sugar and salt. Another reason to make your own mayonnaise – as is often the case with me, is if you’ve run out and can’t pop down to the shops to get some more.

Whipping up your own batch is much simpler than you might think; especially if you have a blender or food processor. Mayonnaise is basically an emulsion of egg and oil, so the trick is just a little bit of patience. If you wish to do it by hand you need to use serious elbow grease, and arm strength is not something I possess. Doing it by hand would be a job for my mom; that’s why she makes the best dairy fudge in the world! So I would recommend only attempting it if your arms don’t get tired too quickly.

I also make a slightly healthier version of this recipe, which I will share with you in part 2 of my Food Revolution dinner party blog. I use it in a lovely dressing for a beetroot salad. If you didn’t catch the first post in this series, you can read it here. Of course, you can also use the mayonnaise in all the ways you would usually enjoy it, like the salad my husband and I had for lunch today, or the tuna filling I created to eat with spicy pudlas.
In addition to this, you can make whichever variations you can dream up, for example; adding ¼ teaspoon of crushed chilli or peri-peri for a bit of spice, or pureé some peppadews and mix it in, or mush up an avocado to make an avo dip. However you prefer to enjoy your mayonnaise, making your own is well worth the little bit of time and effort. In fact, it will take longer to jump in your car and sit in traffic to go to the shops than it will to make it yourself, as it only takes about 10 minutes.

This is what you’ll need:
2 free range / organic eggs
½ t salt
1 t mustard (I used German mustard), or ½ t mustard powder
1/8 t sugar
4 – 5 t white vinegar (or lemon juice)
1 cup vegetable oil (depending on the quantity you would like – I only used ½ cup today)
4 t hot water

This is how to do it:
Step 1
Separate the yolks from the eggs, like this.


Place the egg whites in a food saver for later. For example; on the day of my Food Revolution dinner party, I used the egg whites for another recipe I was making. Today, I’ll be using the egg whites in the chocolate cupcakes I’m going to make after posting this blog.

Step 2
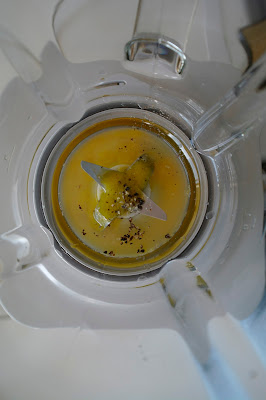
Place yolks, salt, mustard, sugar and three teaspoons of the vinegar in the blender (or food processor fitted with the metal chopping blades), and buzz for 15 seconds on low speed. Next, with the motor running at a moderately high speed, slowly drizzle ¼ cup of oil into the yolk mixture.


Step 3
At this point, the mixture will start to thicken. As this happens, continue adding the oil in a fine, steady stream, alternating with hot water and another teaspoon or two of vinegar. A word of warning; the mixture splatters quite a bit as it thickens, this is when you should add a teaspoon of hot water or vinegar.
You’ll need to scrape the mixture down from the sides of the blender with a silicone spatula every now and then.


Tip:
If you only use half a cup of oil, as I did today, it will make 200 ml of mayonnaise. If you use a cup, it will yield about 320 ml. I would advise you not to make more than this quantity for normal use, as it won’t last as long as store bought condiments. These usually last longer because of all the preservatives they put into it – something that doesn’t put me at ease. It keeps well in the fridge for up to a week, even longer if you’ve used fresh eggs.

Thursday 24 May 2012

Food Revolution Day Dinner Party: PART 1

I decided to get involved with Jamie Oliver's Food Revolution Day on Saturday, 19 May 2012. Basically, it entails cooking with fresh, unprocessed ingredients. As a gluten-free and corn-free person, cooking withe fresh ingredients isn't a very big leap. The closest most gluties get to using processed food is a packet of gluten-free dried pasta. The Food Revolution is also about education: educating people and their families about the rewards of eating real food.


I'm not exactly rolling in the dough yet, though, so I couldn't host a Food Revolution event. But I could host a small dinner party for my husband, sister and her fiancé and educate them about Jamie's revolution. And, of course, I can blog about it and share it with all of you! Since they are already foodies, it wasn't a very difficult task to involve them in the preparation and cooking. If you are passionate about real food, and also want to host a dinner party at some point in time - get everyone involved! Kids too! Make it a collaborative effort. You could even make it a game or competition. That way, you get everybody involved in the satisfaction of creating beautiful, flavourful dishes, without all the processed stuff. Besides the health benefits, the greatest reward for me personally is in the taste. For more information about Jamie Oliver's Food Revolution, go here.


The cooks and photographers:

As this blog post is turning out to be very long, I will be publishing this in three parts; this post which includes one recipe (the starter), and then two more in this week – mains and dessert. In addition to that I will also be blogging in the next week about homemade stocks and gluten-free porridge.

Okay, it’s time to get to the good stuff! I dished up a South African style non-vegetarian menu - I hope you enjoy it. If you are vegetarian, or you don't do liver, read on for alternatives. There are also two vegetarian side dishes and a mouth-watering desert.

Menu
To start: Mini gluten-free vetkoek filled with snoek pâté from our local organic market.


Main course: Lamb's liver served on a bed of savoury buckwheat finished off with a red wine reduction, beetroot salad made my special homemade yoghurt mayonaise dressing and custard peas.


Desert: Gluten-free Cream Apple Tart ("Roomappeltert") made from fresh apples and masala tea.

Tip: When hosting a dinner party, it is advisable to do some things the night or morning before the guests come. For example, for my dinner party I made the desert, cooked the beetroot, made the tart apples and vetkoek batter before hand.


Recipe #1:
Mini GF vetkoek and snoek pâté

Vetkoek
Pronounced "fet" like pet and "cook", vetkoek is directly translated from Afrikaans to English as "fat cake", but it's really a kind of bready fritter which can be eaten with any kind of filling. A definite South African favourite is vetkoek and curry mince. I translated and adapted this vetkoek recipe from boerekos.com. If you are living in the Cape Town area, you can order the GF vetkoek or batter from my home bakery, Michelle's Gluten Free Goodies by sending me a message or posting it on the wall. I do gluten-free platters and baked goods too.

This is what you'll need:

2 cups gluten-free all-purpose flour mix
2 t gluten-free baking powder
Pinch of salt
2 T sugar (or 1 T fructose)
2 Eggs
2 Cups boiling water
Vegetable oil for frying

This is how you do it:

Step 1
Place the dry ingredients in a large mixing bowl and mix well. Beat the eggs in another medium mixing bowl. Add the boiling water into the egg mixture and beat immediately. Mix the egg mixture with the flour mixture and combine well. It will look like mash potatoes and have a thick consistency. If you're not a glutie and you want to make this recipe with normal flour and baking powder, only use one cup of boiling water, and note that the consistency will be slightly runnier.

Step 2
Heat the oil in a non-stick pan on medium heat. Fry the batter, a teaspoon at a time, until golden brown. Then turn over and repeat until both sides are golden brown. For the dinner party I made mini bite-size vetkoek to make it more aesthetically-pleasing. And of course, great finger food for the hungry cooks! Normally, vetkoeks are a bit larger, so you can place a tablespoon at a time if you prefer. Larger vetkoek requires a longer cooking time.


Step 3
Drain well before putting the filling on.

Step 4
Cut open and spread. The snoek pâté I used is from the fish guys in the corner who make the delicious tuna biltong, at The Neighbourgoods Market in Woodstock. You can use any filling you want, as I said before, and if you're not a "fish" person or you're vegetarian, here are a few other options: most cheese goes very well with vetkoek so you could do your favourite cream cheese, cucumber and cottage cheese, cheese and apricot jam or syrup (another South African favourite), alternatively; vegetable curry, lentil pâté, or chicken mayo, boerewors, biltong or curry mince if you're a carnivore.


The result - we polished this plate off in about ten minutes or less.


Friday 11 May 2012

Pancakes and Peas


As a follow up on my first post I'm going to share a traditional Indian recipe with you which contain our wonderful, green friends: peasAbout seven years ago, a friend who was diagnosed with ... well, let's just say she can't eat wheat ... gave me this recipe, and it's so good that I haven't stopped making it since. It's called pudlas, a spicy Indian pancake that is traditionally gluten free and packed with nutrition, and also suitable for vegetarians. My husband and I enjoy many vegetarian dishes, but we are not vegetarians, therefore the recipe accompanying the pudlas is a non-vegetarian one. They can be eaten with vegetarian accompaniments or nothing at all - so read on if you are vegetarian. Pudlas are made with chickpea (chana) flour, which can be found in health shops, Dischem and some supermarkets. For example, the Spar in Seapoint (Cape Town) stocks it. I used Nature's Choice Chick Pea Flour.


These delectable, spicy pudlas are easy to make and can be enjoyed just like that, as a party snack with dips or the South African way - with a filling. If you want to have an authentic Indian meal, the best way to have them is just like that - hot - straight off the stove. Or when you have your favourite Indian, like butter chicken or biryani, swap the naan bread with these cheeky goodies. Another way to enjoy them is with Thakkali Thokku (Sun dried Tomato Spread). Here is an easy Thakkali Thokku recipe from Delectable VictualsAlternatively, you can pick up some hummus, tzatsziki or red pepper cream cheese from the supermarket and simply dip them.

Today, however, I've given them a South African twist by serving it with a Tuna dish I created. It can be used either as a filling or a topping. If you want to use it as a filling, I suggest adding a touch more water to the pancake batter so that you have thinner pancakes that are easier to roll. I used the thicker batter and had to use a toothpick to keep it rolled up. Personally, I prefer the thicker version with the topping because I can have more of the delicious tuna which helps cool down the spicy pudlas.

Spicy pudlas with Michelle's cool yoghurt tuna


This is what you'll need:

Pancakes (makes approximately 7 / 8):
225 g chickpea flour (chana flour)
½ tsp cayenne pepper (I used ¼ tsp crushed chili powder from the Neighbourgoods Market at the Old Biscuit Mill - VERY hot!)
1 tsp cumin seeds, roasted (I'll show you how)
½ tsp turmeric
½ tsp ground sea salt
4 spring onions, chopped
110 g frozen peas, thawed
2 tbsp fresh coriander, chopped
300 ml water
Non-stick spray / vegetable oil for frying (you can also use ghee if you prefer)

Note:  Non-stick spray usually contains Soy Lecithin which is gluten-free, but some people with celiac disease can't tolerate soy products, so if you know that it applies to you rather use vegetable oil or ghee. If you're not sure, check with your doctor or nutritionist.


Michelle's cool yoghurt tuna:
1 carrot, peeled and finely chopped in a food processor or grated
1 spring onion, chopped
1 tbsp coriander, chopped
1 apple, peeled, cored and cubed
About ¼ English cucumber, cubed
1 tin of tuna (170 g), drained
3 tbsp Greek / plain yoghurt
1 tbsp mayonnaise
½ tsp ground cumin
Salt and pepper to taste

This is how you do it:

Step 1
For the pancake batter; place the cumin seeds in a non-stick frying pan (no oil required!). Roast them over medium-high heat, giving the pan a shake and a swirl occasionally, until the seeds darken in colour.


Step 2
Sift the flour in a large bowl. Add all the ingredients except the water and give it a mix.


Step 3
Add the water and mix well to make a batter - it is slightly thicker than normal South African pancake batter. Let the batter rest for an hour.


Step 4
About 30 minutes before the hour is up, make the tuna dish. Simply chop up the veggies and herbs, throw everything in a bowl and mix evenly. Set aside.


Step 5
After an hour, the pancake batter should be more aerated, note the bubbles in the photograph:


Coat a non-stick frying pan with non-stick spray or about one teaspoon (5 ml) vegetable oil, and place on a medium to high stove. Pour a third of a cup (80 ml) into the hot pan - swirl it around until the whole pan is coated. I find that a ladle works easiest - fill the ladle about half with batter, or use a smaller ladle the like the one in the first image. Turn it over when it looks like the picture on the right (no more runny batter), about 2 - 3 minutes.


After another 1 -2 minutes you can take it out of the pan and place it on a plate. Place a microwave lid or something similar over the pudlas - keeping them on the stove top (on a stove that is not being used), or place it covered in a warm drawer to keep it warm until you have made all the pancakes. Coat the pan with non-stick spray or vegetable oil for every pudla.


Step 6
Stack two on a plate, topped with the yoghurt tuna, or fill two pudlas with tuna and roll them up (use the thinner batter for this). Garnish with fresh coriander. Fresh coriander brings out all the flavour in the dish when you eat it together. 


Tuck in and enjoy!